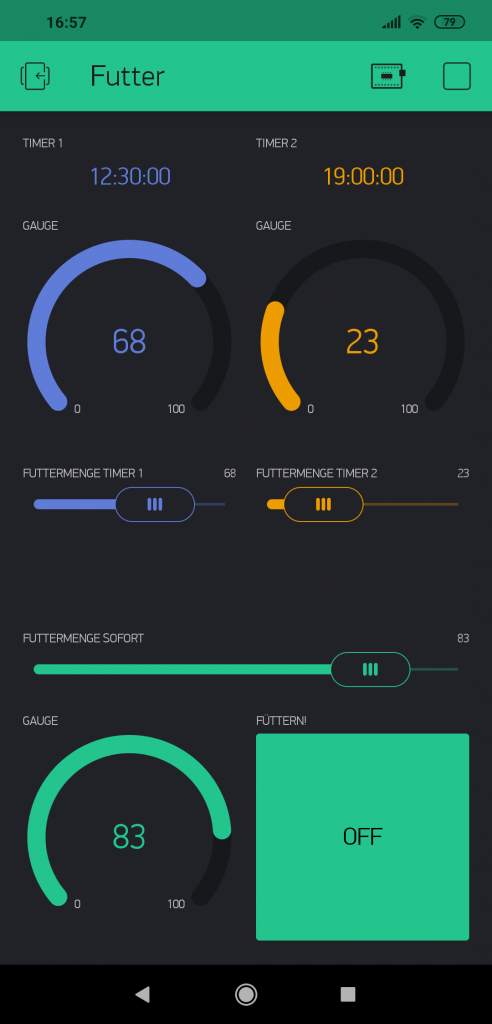
Die Programierung des Microcontrollers ist neben der eingerosteten handwerklichen Tätigkeiten die größte Herausforderung. Ich möchte keinen schlecht aussehenden Webserver verwenden. Mit würde der Tipp gegeben Blynk für die Erstellung einer schicken App zu verwenden.
Tatsächlich lässt sich durch die gut beschriebene Widgetstruktur relativ schnell eine akzeptable App gestalten.

Falls ihr nicht selber herumprobieren wollt, oder euch die App einmal selbst ansehen wollt, scannt einfach folgenden QR-Code.

Die Programmierung des Microcontrollers selbst mache ich mit Hilfte von Arduino. Dazu muss zum einen Blynk mit eingebunden werden und in der Blynk App selbst müssen Pins zur Steuerung festgelegt werden
/*************************************************************
  Download latest Blynk library here:
    https://github.com/blynkkk/blynk-library/releases/latest

  Blynk is a platform with iOS and Android apps to control
  Arduino, Raspberry Pi and the likes over the Internet.
  You can easily build graphic interfaces for all your
  projects by simply dragging and dropping widgets.

    Downloads, docs, tutorials: http://www.blynk.cc
    Sketch generator:           http://examples.blynk.cc
    Blynk community:            http://community.blynk.cc
    Follow us:                  http://www.fb.com/blynkapp
                                Tweets by blynk_app

  Blynk library is licensed under MIT license
  This example code is in public domain.

 *************************************************************
  This example runs directly on ESP8266 chip.

  Note: This requires ESP8266 support package:
    https://github.com/esp8266/Arduino

  Please be sure to select the right ESP8266 module
  in the Tools -> Board menu!

  Change WiFi ssid, pass, and Blynk auth token to run :)
  Feel free to apply it to any other example. It's simple!
 *************************************************************/

/* Comment this out to disable prints and save space */
#define BLYNK_PRINT Serial


#include <ESP8266WiFi.h>
#include <BlynkSimpleEsp8266.h>

// You should get Auth Token in the Blynk App.
// Go to the Project Settings (nut icon).

 char auth[] = "EuerAuthTokenvonBlynk";

// Your WiFi credentials.
// Set password to "" for open networks.

char ssid[] = "EuerWLAN";
char pass[] = "EuerWLANPW";

//Variablendeklaration
int futtermenge = 0;
int futterbutton = 0;

int futterMengeTimer1 = 0;
int futterMengeButton1 = 0;

int futterMengeTimer2 = 0;
int futterMengeButton2 = 0;

// hier Futtermengenmultiplikator eingeben. Für kleine Katzen eher 30, für große Katzen eher 40
int multiplikator = 30;

BLYNK_WRITE(V1)
{
  int slider = param.asInt(); // assigning incoming value from pin V1 to a variable
  futtermenge = slider;

  // You can also use:
  // String i = param.asStr();
  // double d = param.asDouble();
  Serial.print("V1 Slider value is: ");
  Serial.println(slider);
}
BLYNK_WRITE(V0)
{
  int button = param.asInt();
  futterbutton = button;

  Serial.print("V0 Button value is: ");
  Serial.println(futterbutton);
}

BLYNK_WRITE(V2)
{
  int timer1 = param.asInt();
  futterMengeButton1 = timer1;
}

BLYNK_WRITE(V3)
{
  int timer2 = param.asInt();
  futterMengeButton2 = timer2;
}

BLYNK_WRITE(V4)
{
  int timer1Menge = param.asInt();
  futterMengeTimer1 = timer1Menge;
}

BLYNK_WRITE(V5)
{
  int timer2Menge = param.asInt();
  futterMengeTimer2 = timer2Menge;
}


void setup()
{
  // Debug console
  Serial.begin(9600);

  Blynk.begin(auth, ssid, pass, "iot.informatik.uni-oldenburg.de", 8080); // Blynk.begin(auth, ssid, pass);
  pinMode(14, OUTPUT);


}

void futter() {
  if (futterbutton == 1) {
    digitalWrite(14, HIGH);
    delay(futtermenge * multiplikator);
    digitalWrite(14, LOW);
    delay(1000);
  }
  else if (futterMengeButton1 == 1) {
    digitalWrite(14, HIGH);
    delay(futterMengeTimer1 * multiplikator);
    digitalWrite(14, LOW);
    delay(1000);
  }
  else if (futterMengeButton2 == 1) {
    digitalWrite(14, HIGH);
    delay(futterMengeTimer2 * multiplikator);
    digitalWrite(14, LOW);
    delay(1000);
  }
}

void loop()
{
  Blynk.run();
  futter();

}